I’d like to introduce you to a comprehensive write-up on how to become a BMW specialized hobby-mechanic. It’s funny how seemingly intimidating this can be. As I search through the forums, I see so many people struggle and get confused with what is what, how to install, problems during installation, connectivity issues, driver issues, or simply don’t understand or become overwhelmed by the amount of information. To help the community, I’d like to break this information up into 2 stages.
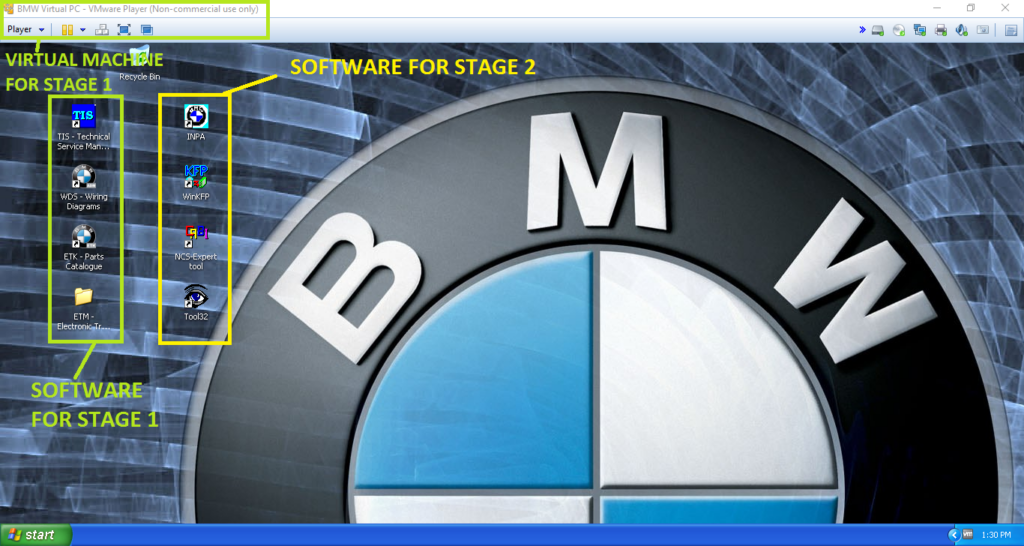
The first stage is getting your computer setup with the basics, including a virtual machine with Windows XP SP3 which includes the wiring diagrams, technical information, and parts catalogue. All things that do NOT integrate with a car through OBDII.
The second stage is actual code reading through INPA, EDIABAS, WinKFP with a FT232RL cable.
STAGE 1:
This is nothing more than acquiring wiring diagrams, parts catalogue, which can also be found at www.realoem.com, and TIS, which is step-by-step instructions for basic and more complex repairs to yoru BMW. Here’s what you need to get started.
Go on Ebay and buy yourself a BMW service repair workshop manual including TIS/WDS/ETK/EPC/ETM.
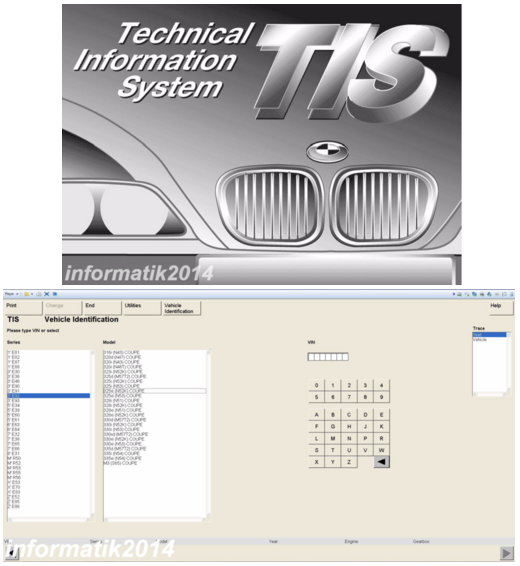
TIS – Technical Information Systems. The most detailed, comprehensive step-by-step procedures, explanations, and pictorial diagrams from bumper to bumper you will ever see. All major and minor service and repair instructions included.
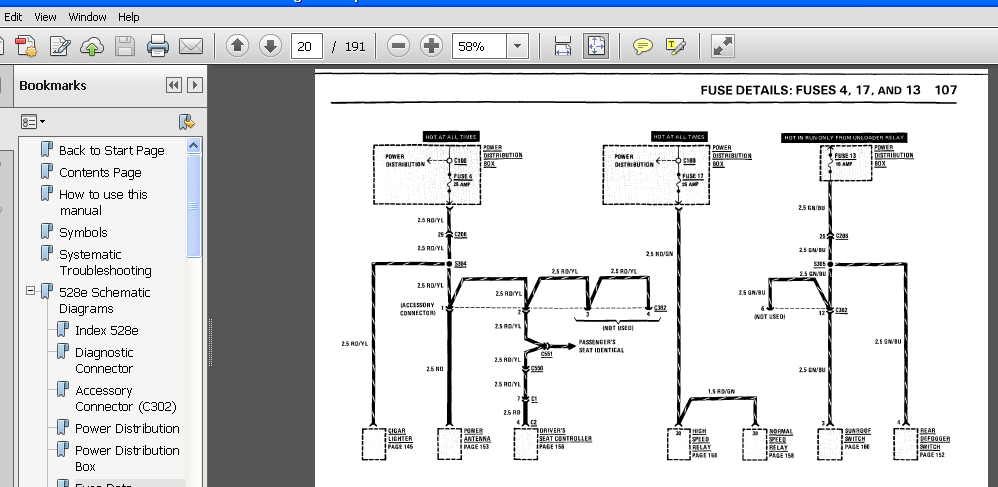
WDS – Wiring Diagrams (1982 – 2008). Every wiring diagram for all BMW’s. From components to pins to connectors and much more. Fully interactive and user-friendly! There’ll be another blog post on how to navigate through these wiring diagrams specifically.
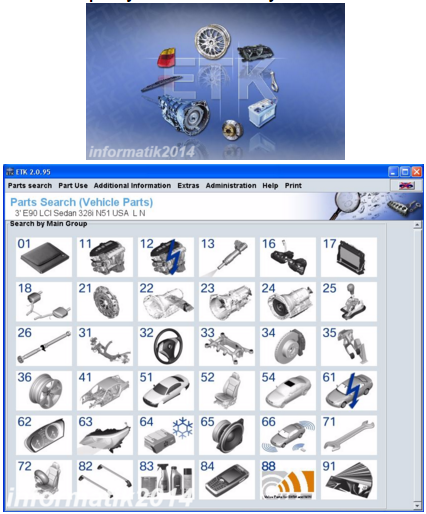
ETK/EPC – “Parts Catalog” (Covers 1982-2013): The most detailed and extensive BMW parts catalog on the Internet. Now includes PRICES as well, something that was not included in earlier versions. Comes with exploded diagrams for a detailed analysis of all parts.
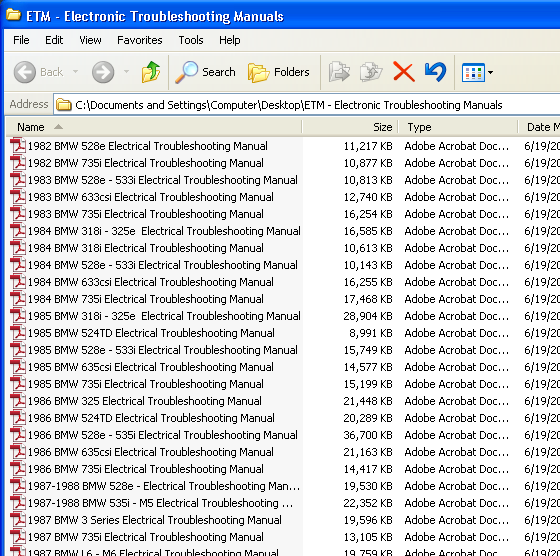
ETM – Electronic Troubleshooting Manuals. These are the old PDF’s for all BMW’s made in the 80’s/90’s & early 00’s. Electronic wiring diagrams and connector view guides that complement the Wiring Diagrams.
This typically comes in one or two DVD’s and can be found on ebay for anywhere from $10-$15. The DVD comes with a VM (Virtual Machine) application for this to be installed on a Windows XP SP3 tunnel. This is mandatory and complements your stage 2 upgrade of INPA/EDIABAS/WinKFP/NCS…etc.
STAGE 2:
This is where things become more complicated…and for good reason. I would like to take some time to guide you through the detailed installation. Again, you absolutely need to either have a dedicated Windows XP SP3 computer, or you can have a windows 7, 8, or 10 computer, as long as you have a virtual machine set-up as I documented above in stage 1.
What you see below is taken from www.bmwcoders.com and is free information online.
However, the download links to the latest software is becoming harder to find. And as a result, I’ve taken the 700MB INPA file and have it on my [email protected] Dropbox account which can be accessed with a simple request to me.
DOWNLOAD THIS ON YOUR PRIMARY COMPUTER, IF RUNNING WINDOWS 7, 8, or 10, OR IF YOU’RE RUNNING A VIRTUAL MACHINE, YOU MUST BRING ALL OF THESE FILES TO YOUR VIRTUAL MACHINE. It’s a 700MB file, so it takes a while, but all of the installation itself you see below must be done on the Windows XP SP3 machine.
So what is it, and what’s included in the download?
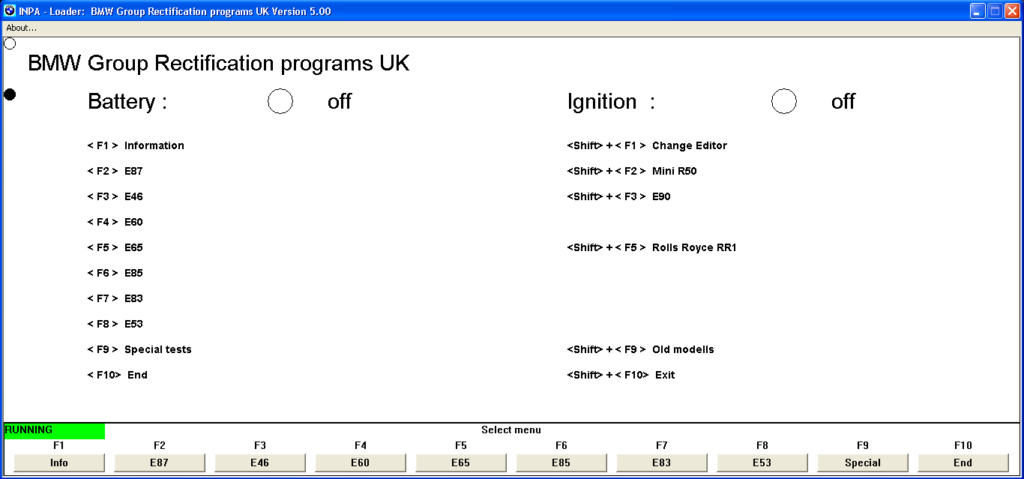
INPA/DIS – The most common version is 5.0.2. This is not an acronym for anything that I’m aware. It’s the portal for which you can connect directly to your car’s computer on all 1996+ OBDII BMW’s. This includes most if not all models from 1996 to TODAY. INPA does diagnostics including read/reset engine codes. It also communicates with your other computers (Transmission, ABS, Instr Cluster, Seats, Cruise Cntrl…..etc).
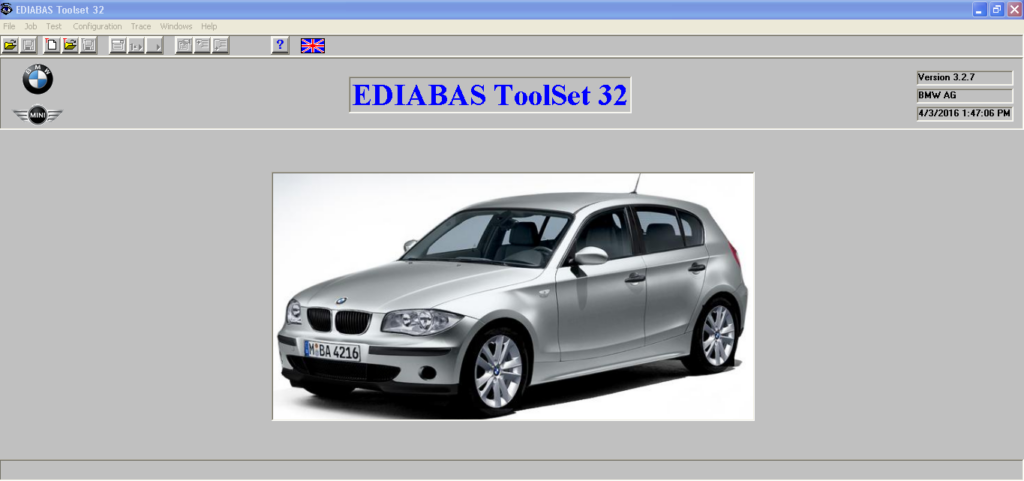
WinKFP – This program allows you to flash ECU’s and reprogram your module. Unless you know exactly what you’re doing, do not use this program. It takes some specialized knowledge in order to extract the files and reflash the ECU’s. This will be covered in future blog posts.
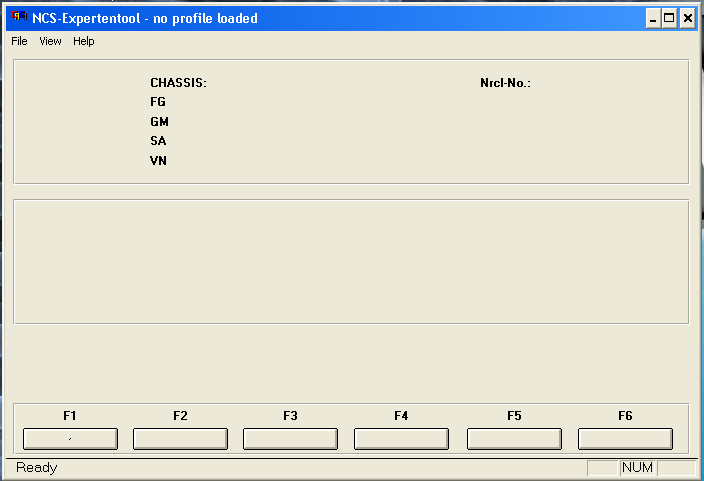
NCSexpert – This is used for coding. You can enable options that are not normally installed on your car. It’s mostly in german, so you have to do a lot of research to ensure that you don’t unintentionally screw up your ECU.
Tool32 – This allows you to conduct specific tests on your engine. You can actuate VANOS, cycle your ABS pump or move your seats if you’d like. It’s mainly used for diagnosis more than what INPA can do. It’s useful if you’re trying to debug a problem on your BMW.
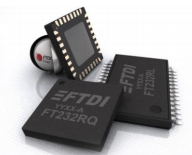
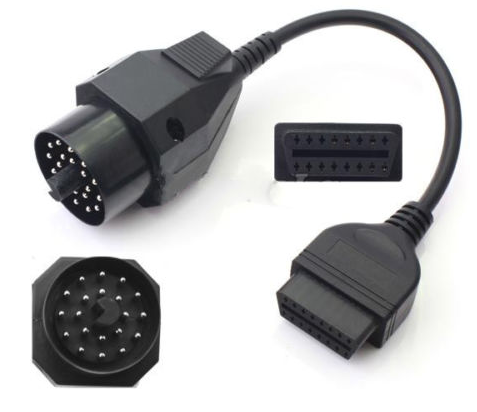
What to purchase? You need a cable. That’s a fact. You need a DCAN + K-Line cable with a FT232RL usb chip inside the cable. The FT232RL chip is your interface from OBDII to your USB computer. There are cheap cables out there with other interface chips (CH340 for example). Do not buy these cables as they are unreliable and have connectivity and driver issues. The FTDI FT232RL Chip is much better for this application. See below for a picture of the cable you should buy. Your best bet is to do this:
- Go to www.ebay.com or google
- Type in the following search criteria: “DCAN cable FT232RL”
- Buy a cable no more than the $15-$30 range.

Again, as long as it has the FT232RL Chip, you’re good.
You might benefit from getting access to your diagnostic through this system as well. For that, I purchased an OBDII to Diagnostic adapter. It connects to your OBDII port of your DCAN Cable and plugs directly into your diagnostic port in your BMW ranging from 1996 to 2005 timeframe. After 2005, they removed the Diagnostic port altogether and now solely rely on the OBDII.
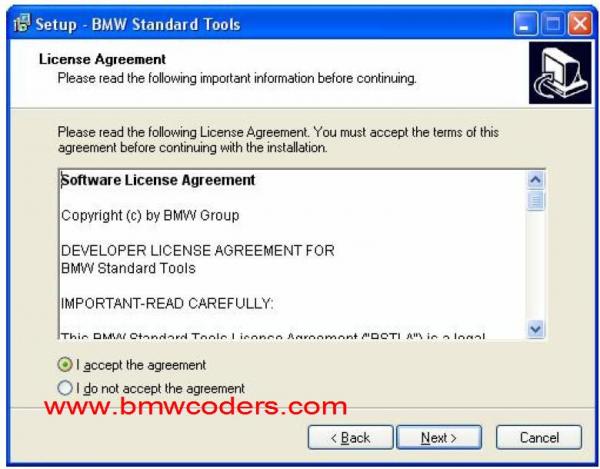
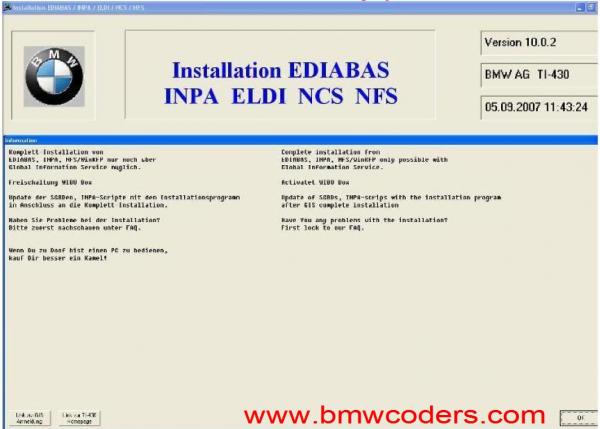
Now that you have the necessary cables, do not plug them in to your computer yet. Set them aside. You must access and download the software. Follow these directions EXACTLY as you see them below. The screenshots are again, from www.bmwcoders.com.
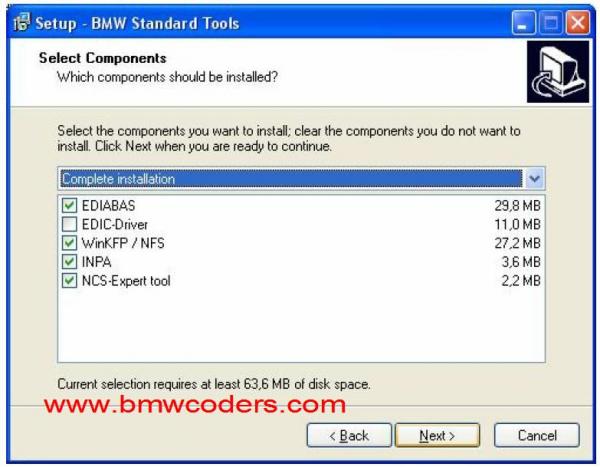
Unpack INPA and run Programminstallation/setup.exe Application
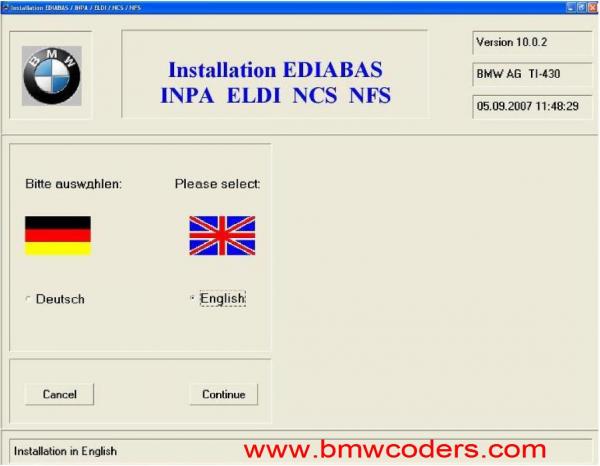
Choose language:

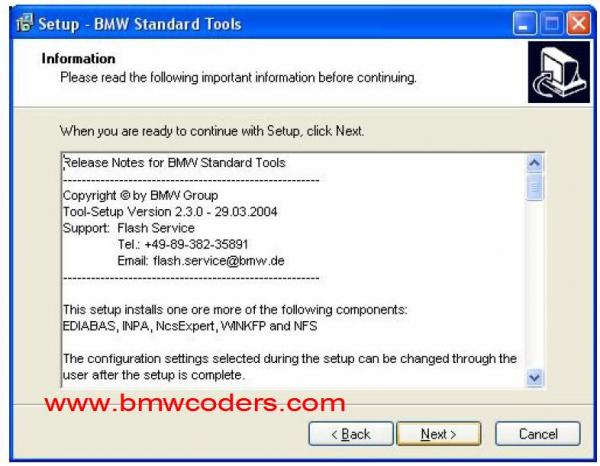
Click “Next”:

Next step:
Next step:
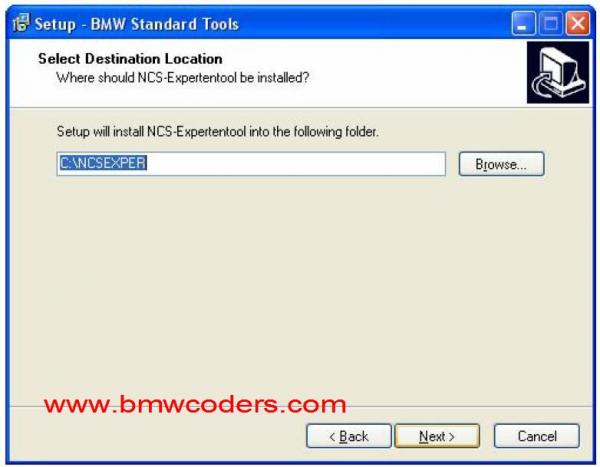
Next step:
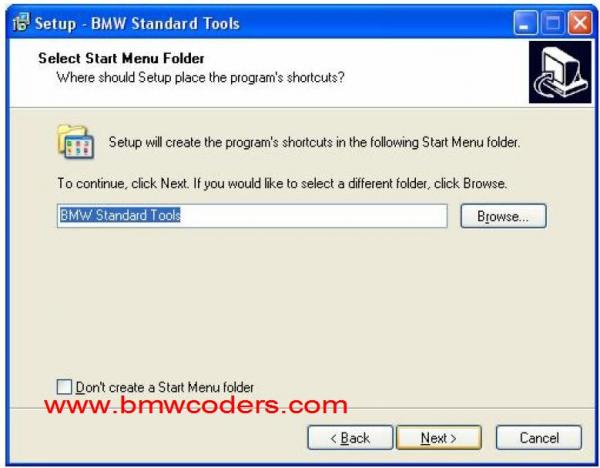
Next step:
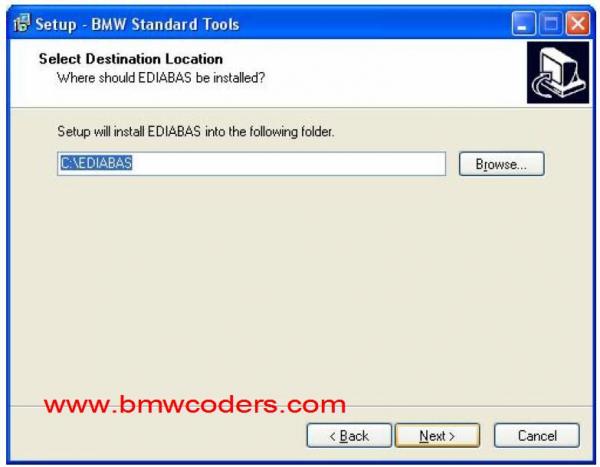
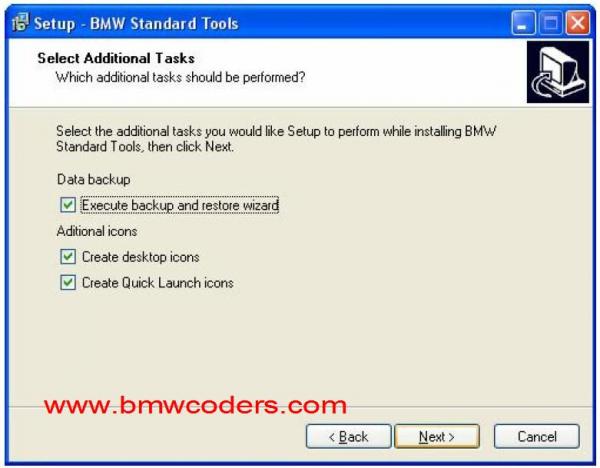
Next step:
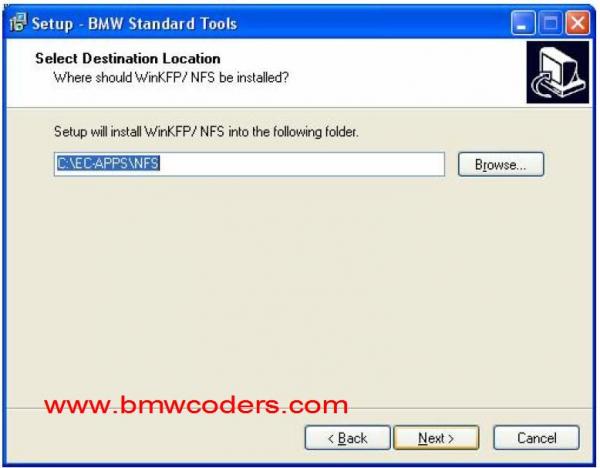
Next step:
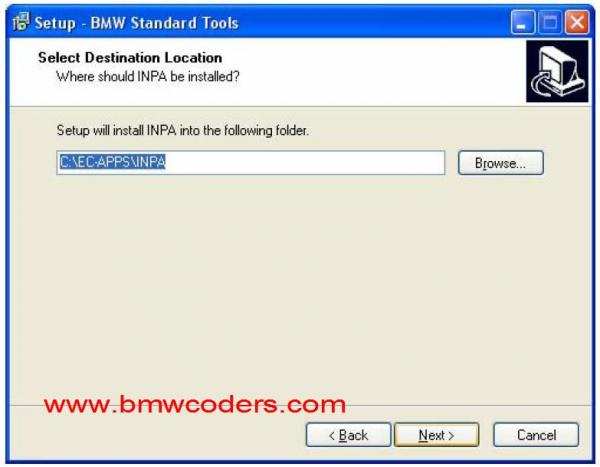
Next step:
Next step:
Next step:
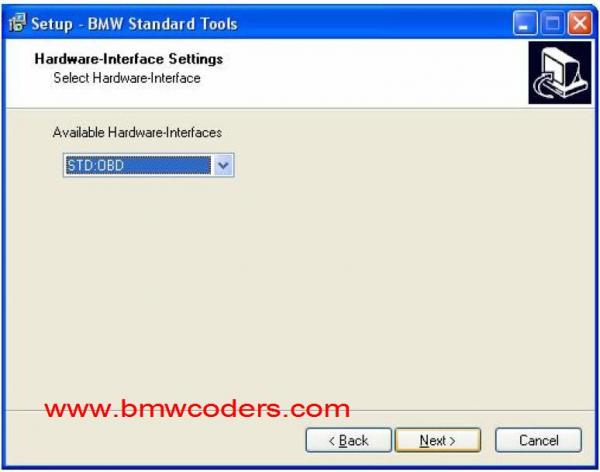
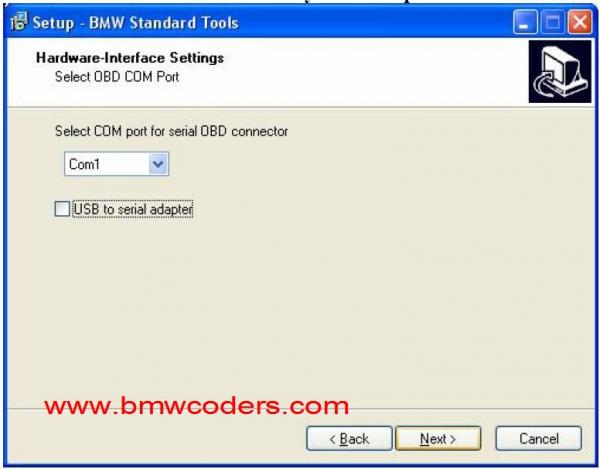
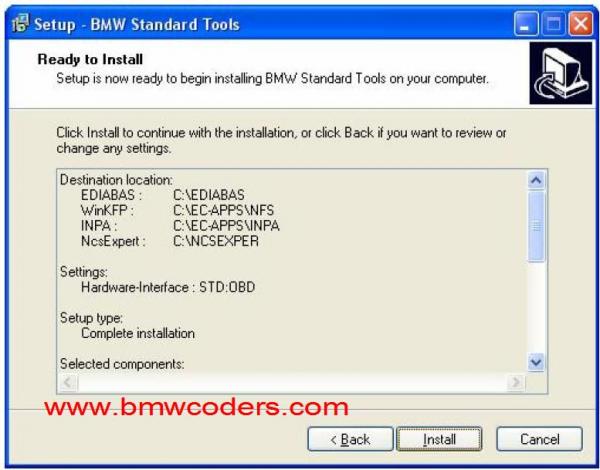
Next step: Select “STD:OBD”
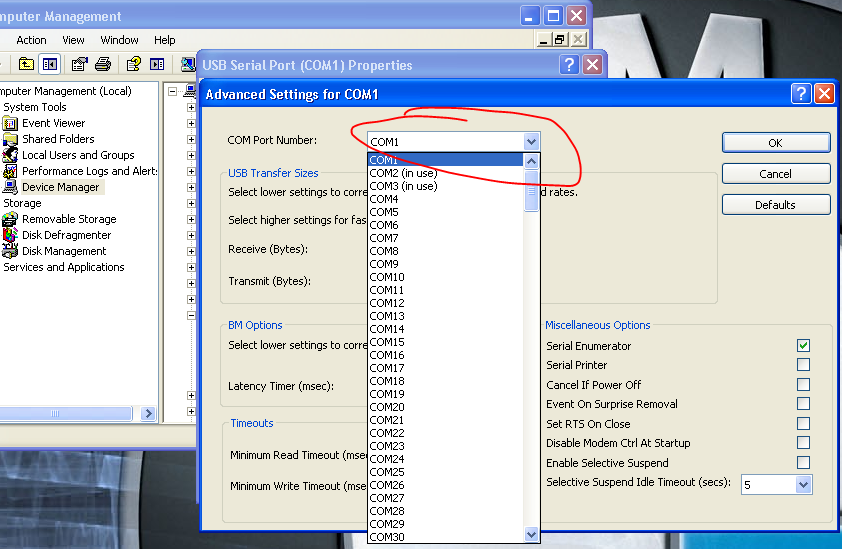
Next step is very important. Whatever COM you select will need to match the driver when you install the DCAN Cable. I recommend you use the first available COM.
Next step:
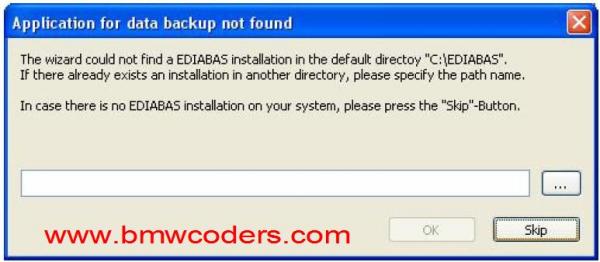
Next step (click “skip” 3 times):
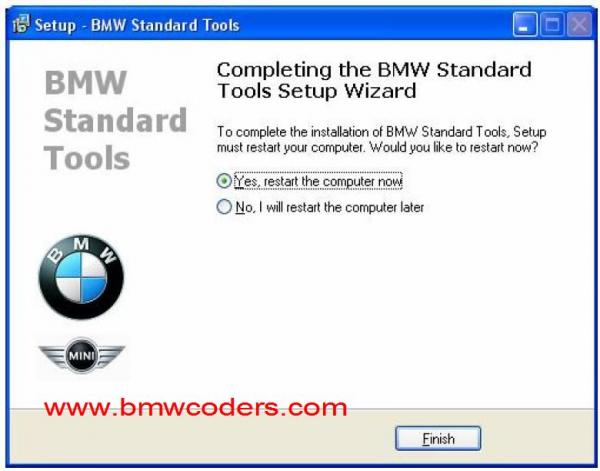
Next step (restart your computer). If you have a Virtual Machine, restart the machine and let it reboot normally.
After restart:
Open :\Referenz.2005\INSTALL\Instprog.exe. It’s the application.
Click OK:
Choose Language for UK:
In next 2 windows click “Continue”.
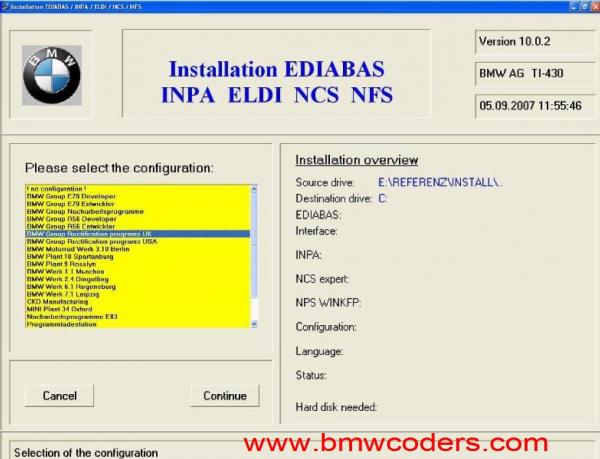
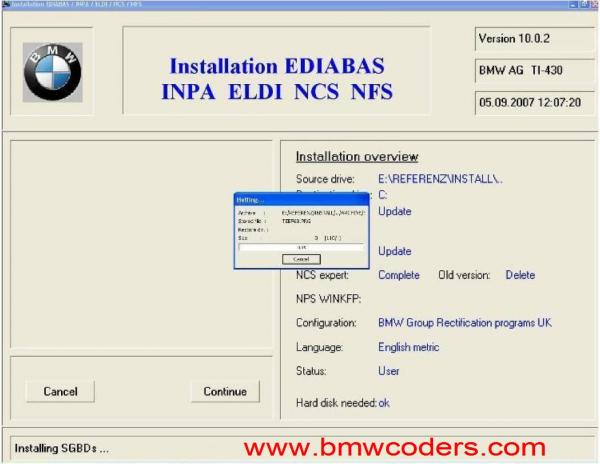
In next window choose BMW Group Rectification programs UK: Notice the Source drive. This is important that you unzip the INPA files to the correct path or it will not find it. ALL OF THE UNZIPPED FILES NEED TO BE PLACED IN YOUR C:\ DIRECTORY. Adding it as a subfolder will prevent you from moving past this step.
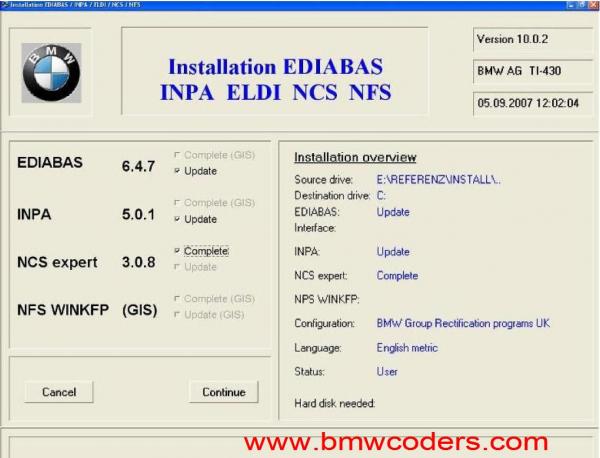
In next windows set 3 checkmarks:
In next 2 windows click “Continue”
After copying click “END”
Now, here’s where your DCAN + K-Line USB Cable come into play. This is where you may need to load your drivers as a one time setup. After that, plug and unplug as much as you’d like. Here is what you need to do.
- Open your VMware or equivalent virtual machine for Windows XP SP3.
- Plug in your DCAN Cable into your computer, USB 1.0, 2.0, 3.0 – Doesn’t matter.
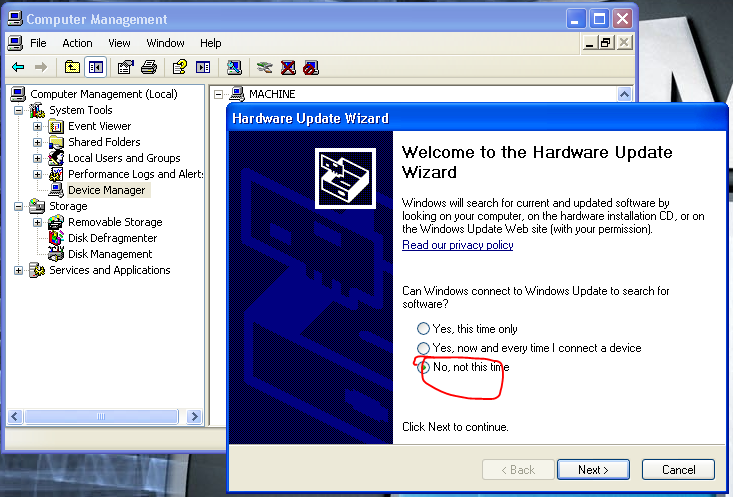
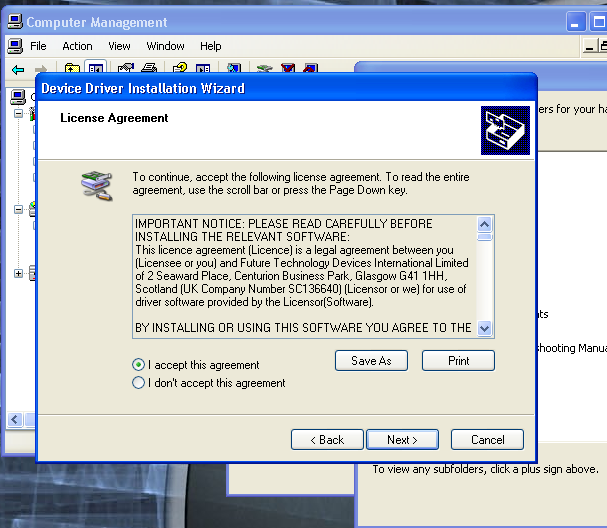
- Depending on your computer or VM, you it might recognize the USB easily and load the FT232RL Drivers automatically. If that’s the case, then follow the steps and complete that driver installation. If that does not work, follow the steps below.
In my dropbox folder I’ve shared with you contains a driver called, “CDM v2.12.06 WHQL Certified”. Follow the instructions below for installation. AGAIN, INSTALL THIS IN YOUR VM OR WINDOWS XP SP 3.
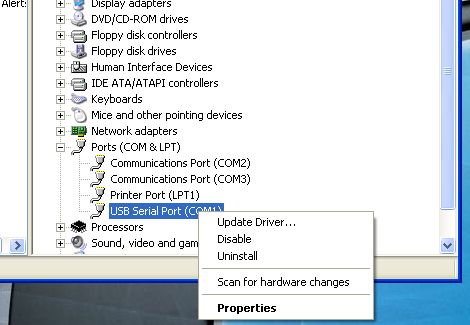
When you plug in the cable, and you have question marks by the drivers, do the following:
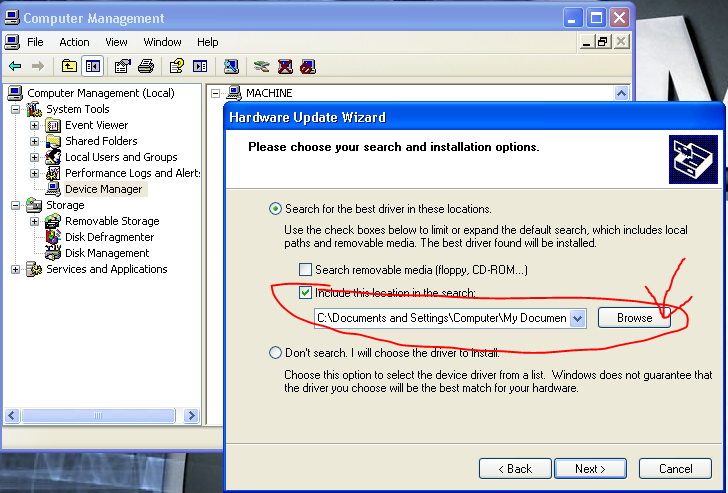
Right click on the driver and click on update driver:
Click next:
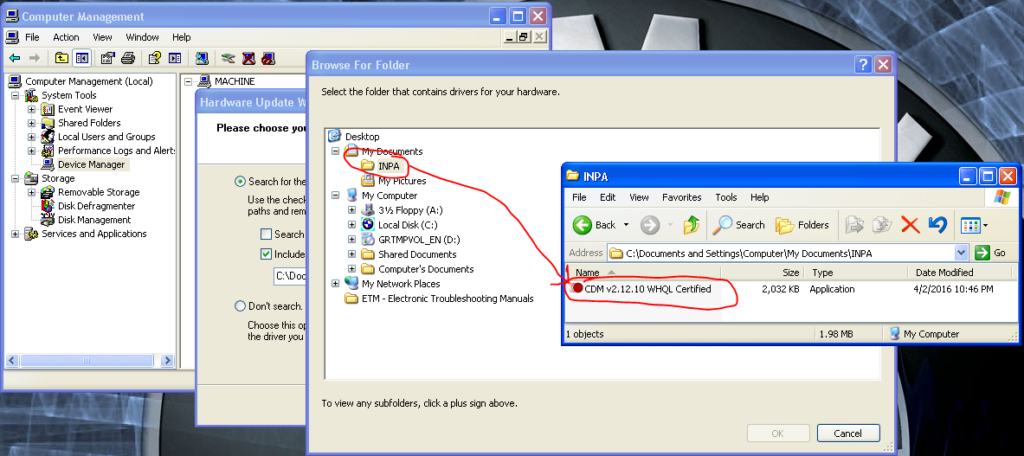
Click browse: Then open your documents folder, or the folder that you saved all of the INPA files.
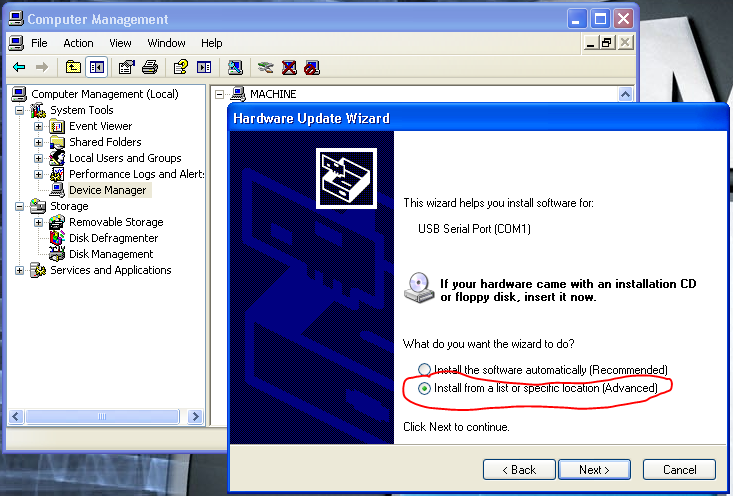
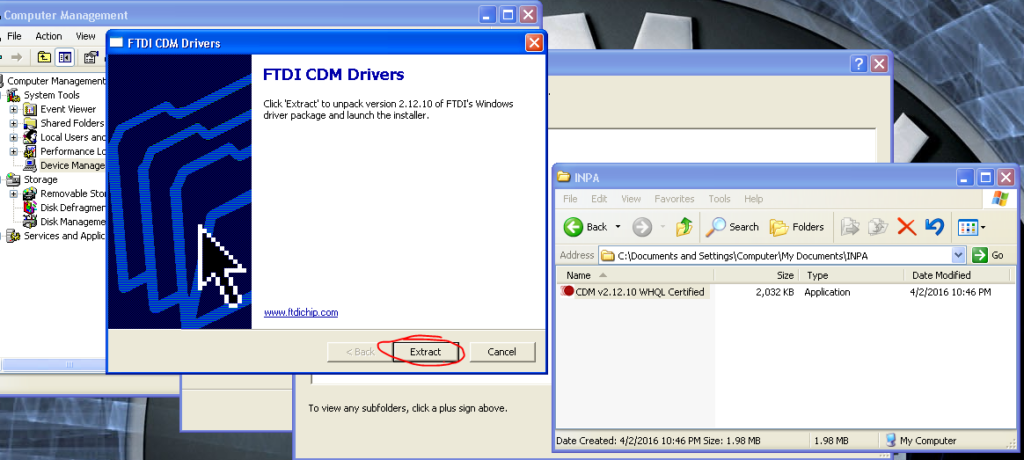
Find the file “CDM v2.12.06 WHQL Certified”. Double click it and it will load the drivers.
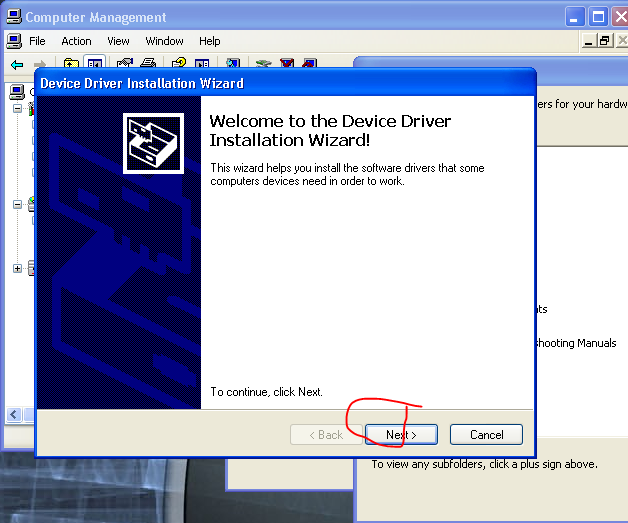
Click next:
Click Finish:
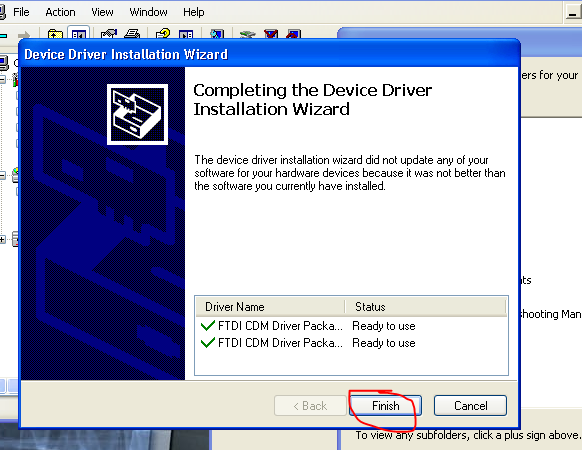
There should be no more question marks or exclamation points.
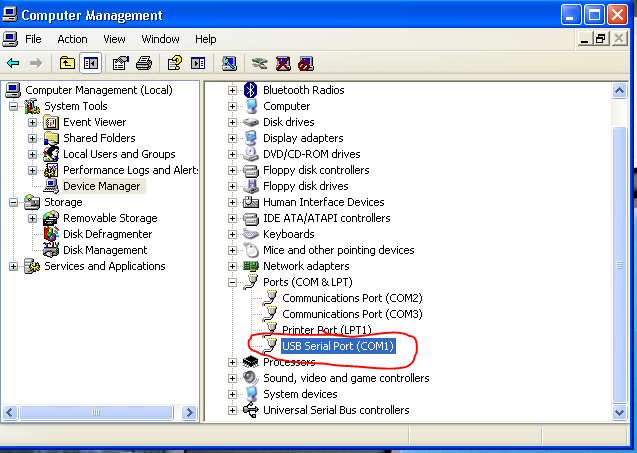
Now go back to your device manager and locate the usb for the DCAN cable. Ensure that the port is the same COM as that you have chosen when you originally set up INPA. I recommend 1, but as long as they match, you should be OK. You can change the port by doing the following:
Right click on the Port and click “Properties”.

On the port settings tab, click “advanced”
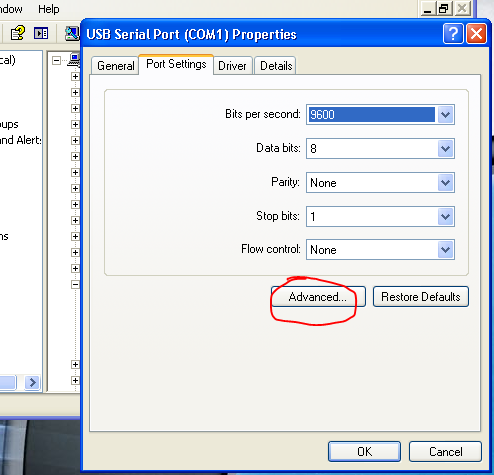
On the drop down, pick the correct COM port that is not already in use. Again, you must have the COM’s match from the initial INPA Installation. Click Ok, Ok, Ok, Ok, until all is good.
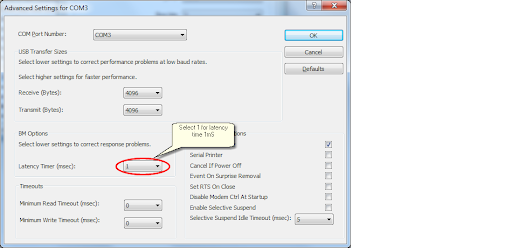
So very important, do NOT forget to set the Latency Timer (msec) to 1. This essentially allows the COM port to ping more frequently with less dwell times, since the computer needs to communicate with your laptop at a very high refresh rate. See below:
Now’s a good time to restart your Windows XP SP3 machine or your VM.
Now is where it all comes together. Start up your VM Windows XP SP3, plug in your cable to the computer and then to your car. Turn the key to ignition and you should see the following: